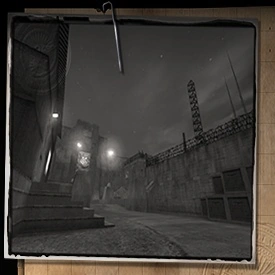
The level shot for Rocket Base.
Rocket Base is the second part of Weapons of Vengeance mission from Return to Castle Wolfenstein.
Mission Briefing[]
German resistance informs us that the rocket Deathshead intends to fire at London carries some kind of new chemical warhead, the total destructiveness of which is currently unknown.
German resistance also informs us that all of these rockets have a "self-destruct" switch, usually located in the main rocket control room. Unfortunately, we know virtually nothing of the interior layout of the base. It will be up to you to determine the best means of reaching the main control room so that you can destroy the rocket before it reaches London.
After destroying the rocket it is likely that the base will be on full alert. Use all means available to exit the base and proceed to the outer compound.
Objectives[]
- Locate Main Control Room.
- Terminate launch of V2 rocket. Before it launch.
- Locate exit and proceed to the Outer Compound.
Walkthrough[]
You begin the mission stowed away in the back of a truck. Kick the tailgate open and turn to your right. Once you're out of the truck, you have to race to the control room and hit the autodestruct before the V2 rocket can be launched. Although there are plenty of Nazis to fight, your enemy is the clock, so kill only to clear your path to the control room or to defend yourself. You'll have an opportunity to mop up later.
Run up the steps at the end of the loading platform and turn to your right. Take out any Nazis in your way. Proceed forward through a passageway to locate a lift shaft. You may have a firefight on your hands while you're waiting for the lift. If you have a grenade, toss it into the lift just before it reaches your level to take out the Nazis riding in it. Take the lift down to the lower level. You will be in a room with some railroad tracks. There is a control panel that will activate the car sitting on the tracks. You can ride it, but you're better off just running through the tunnel at the far end of the room, following the tracks. You'll cross a narrow bridge, enter another tunnel, and emerge into a room with another control panel for the train car and a Nazi manning it. Take him out.
Locate another lift shaft. You'll have to wait for it to come down. There will be some bad guys in the lift that you will have to fight before you can board it. When you get to the top, you'll see some soldiers working on a machine. It will explode if you shoot it a few times, taking the soldiers out. There will be a ladder immediately to the right of the lift. Climb it, take out the guard, and go through the door to the outer control room. The next door will take you to the inner control room. Locate a control panel with the autodestruct button and activate it. Both control rooms are full of Nazis, so you'll have to fight your way to the autodestruct.
Once the rocket is destroyed, go back the way you came, down the ladder. The doors to the launch bay will have opened, but the lift will have been destroyed. Fight your way through the launch bay, through some tunnels, up some stairs, and across some bridges, to get to the exit. The last bridge is rigged to blow, so you'll have to race across it before it is destroyed. You'll eventually emerge into the loading area you started in. From here, you can retrace your steps to rack up some more kills. When you want to get out, look for a door off the loading area into a room that has some stairs going up. You'll emerge onto a catwalk above the loading area. Look for a small grate in the wall. Kick it out to reveal the exit.
There is another way to begin the level. In the starting room, there is a box-shaped crane with gas cylinders in it. Surprisingly, enemies won't see you inside. If you sneak inside it without alarming the guards, the crane operator will soon move the crane a level down, into the railroad car. The railroad car will take you through the tunnels.
Secrets[]
- In the room after the collapsing bridge, there is a hatch hidden behind a bulletin board. To open it, turn to the right and walk over to the left side of the table with the note on it. There is a button on the underside of the table. Press it to open the hatch, revealing two gold bars.
- The cubby containing the treasure cannot be entered, so the items must be picked up with the Activate key.
- It is possible to pick up the gold bars without getting credit for the secret.
Gallery[]
Screenshots[]
.PNG "RTCW - Rocket Base (Secret 1).PNG (955 KB)")
")